

Did you know that over 10 million servings of Swedish Princess Cake are enjoyed in Sweden every year? It’s the country’s most beloved layered dessert. This iconic princess cake might surprise you—it’s called “Prinsesstårta” not because of royal ties, but due to a historic mix-up in translation.
Perfecting this swedish princess cake at home means recreating its signature green marzipan dome, airy sponge layers, and velvety vanilla custard. Don’t let its elegant appearance intimidate you: this guide breaks down the steps to craft a showstopper that’s as delicious as it is impressive.
Key Takeaways
- Swedish Princess Cake features three sponge layers, custard, and whipped cream under a marzipan dome.
- It’s traditionally served at birthdays and celebrations in Sweden.
- Learning how to make a princess cake requires precise layering but no professional tools.
- The green marzipan symbolizes the cake’s identity and is easy to shape at home.
- Mastering the whipped cream dome ensures a visually stunning final product.
The History and Tradition of Swedish Princess Cake
Every slice of princess cake has a royal tale. Let’s dive into its story from a classroom recipe to a national treasure.
Origins of the Prinsesstårta
In the 1920s, Swedish teacher Jenny Åkerström made a layered cake for her students. The name prinsesstarta came when Crown Princess Margarethe and Princess Esmeralda loved it. This green-marzipan-topped cake, known as swedish princess cake worldwide, became a favorite in Swedish bakeries by the 1950s.
Why the Princess Cake Remains Popular Today
Its lasting charm comes from:
- Tradition: A holiday and birthday favorite
- Versatility: Can be made vegan or gluten-free
- Festive flair: Celebrated during Princess Cake Week in Sweden
Traditional vs. Modern Variations
| Traditional | Modern |
|---|---|
| Classic green marzipan | Rainbow hues for events |
| Vanilla custard filling | Flavors like matcha or salted caramel |
| Serviced in cafés | Home DIY kits and online tutorials |
Whether you stick to the classic or try new colors, the princess cake connects tradition and creativity.
Essential Ingredients for Your Princess Cake
To make a swedish princess cake like the classics, start with the right ingredients. This dessert needs specific parts to get its layers and soft texture. Here’s what you’ll need to begin baking.
- Sponge Cake Base: Eggs, sugar, flour, potato starch, and baking powder make the cake light. Potato starch is key for airiness.
- Vanilla Custard: Milk, vanilla bean, egg yolks, cornstarch, and sugar make the creamy filling. Real vanilla is essential for a delicious how to make a princess cake.
- Whipped Cream: Heavy cream, sugar, and vanilla make the iconic dome. Ultra-pasteurized cream whips up better.
- Marzipan: Sweetened almond paste and powdered sugar cover the cake. Choose premium almond paste for a smooth look.
| Ingredient | Quantity | Notes |
|---|---|---|
| Eggs | 6 large | Room temperature for even mixing |
| Potato starch | 2 tbsp | Key for sponge texture |
| Heavy cream | 2 cups | Chill equipment before whipping |
| Almond paste | 16 oz | Check for natural almond flavor |
Quality is crucial for marzipan and vanilla. They give the swedish princess cake its unique taste. Don’t swap cornstarch with tapioca starch unless you must. This list helps you shop smart and avoid last-minute rushes. Now, you’re set to move on to tools and equipment.

Tools and Equipment You’ll Need
Learning to make a princess cake begins with the right tools. Even if you’re new to baking, you likely have most of what you need. Here’s what you should gather before you start:
Baking Essentials
Every princess cake recipe needs some basics:
- Mixing bowls (metal or glass)
- Electric mixer (stand or hand-held)
- 9-inch round cake pans
- Parchment paper
- Offset spatula
- Cooling racks
Specialty Items for Decoration
For that classic look, consider these:
- Cake dome mold (to shape the whipped cream top)
- Cake turntable (for easy decorating)
- Bench scraper (for even layering)
- Piping bags and star tips (for decorative swirls)
Substitutions for Hard-to-Find Tools
Don’t worry if you can’t find some tools. Try these alternatives:
| Original Tool | Substitution |
|---|---|
| Cake dome mold | Inverted mixing bowl or upside-down skillet |
| Cake turntable | A lazy susan or rotating plate |
| Piping tips | Ziplock bag with a snipped corner |
Remember, creativity is key. Even without special tools, you can still make a great princess cake. Start simple and add more tools as you get better!
Preparing the Perfect Sponge Cake Layers
The base of a Swedish princess cake is sponge layers that are so light they crumble easily. These steps help make the layers airy, just like in authentic princess cake recipes. By following these methods, you can create layers that hold the filling without tearing.
Achieving the Ideal Texture
Start by whisking egg whites until they form soft peaks. Then, gently fold them into the batter with a spatula. Be careful not to overmix, as it can deflate the air pockets. Room-temperature butter and milk help with even moisture absorption, a trick from expert bakers. Let the batter rest for 10 minutes to relax the gluten, making the layers light and fluffy.
Tips for Even Baking
- Preheat your oven to 350°F (175°C) and check with an oven thermometer.
- Use cake strips to wrap your pans and prevent dome peaks. Bake until a toothpick comes out clean.
- Rotate your pans halfway through baking for even browning.
Make-Ahead Options
Here are ways to store your layers:
| Method | Storage Time |
|---|---|
| Frozen (wrapped in parchment and foil) | 1 month |
| Refrigerated (airtight container) | 3 days |
Thaw frozen layers in the fridge overnight. Assemble the cake no more than 12 hours before serving to avoid sogginess.
Creating the Vanilla Custard Filling
The vanilla custard is the heart of the princess cake recipes and swedish princess cake. It must be smooth and slightly thick. Start by whisking sugar and cornstarch in a saucepan until blended.
Mix in milk while heating, stirring constantly over medium heat. Lumps form quickly, so use a spatula to scrape the pan’s bottom.
For vanilla flavor, choose between vanilla beans, vanilla paste, or extract. Add it at the end. Taste as you go—this layer balances the cake’s sweetness. The custard is ready when it coats the back of a spoon without dripping.
Remove from heat immediately to avoid overcooking.
- After cooking, press plastic wrap directly onto the custard’s surface. This prevents a skin from forming while cooling.
- Cool custard completely in the fridge, up to 24 hours. It thickens as it chills.
If lumps appear, blend custard in a food processor until silky. If too thin, reheat with a bit more cornstarch mixed in cold water. This step is critical—custard that’s undercooked weeps moisture into the sponge layers. Patience here ensures your swedish princess cake holds together perfectly when assembled.

Whipping the Perfect Dome of Cream
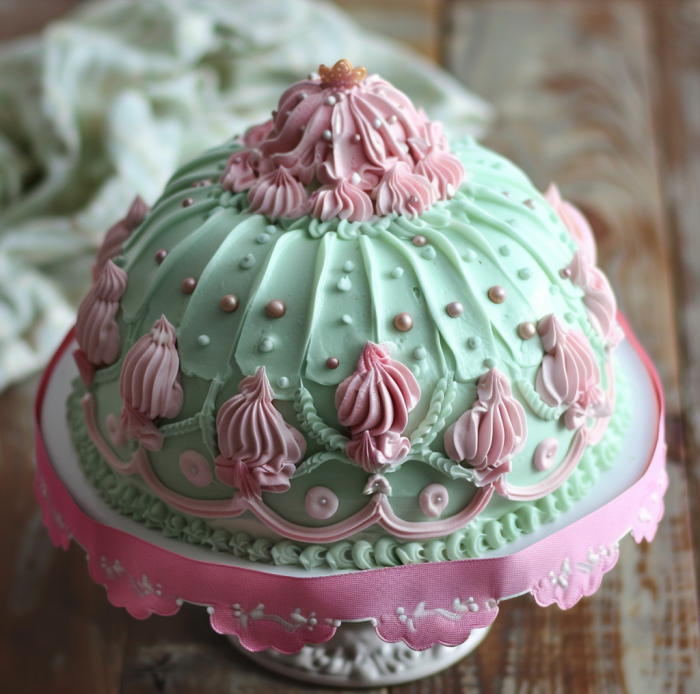
Creating the iconic dome of a Swedish princess cake (prinsesstarta) is key. The whipped cream must be stiff yet light. This is crucial for the cake’s signature look, a must for how to make a princess cake that wows everyone.
Stabilizing Your Whipped Cream
Cream needs to be firm but smooth. Add stabilizers like gelatin, mascarpone, or confectioners’ sugar to prevent it from melting or falling apart. Here are some tips:
- Gelatin: Mix 1 tsp unflavored gelatin with 2 tbsp water, heat until dissolved, cool slightly, then fold into whipped cream.
- Mascarpone: Blend ¼ cup into heavy cream before whipping for creaminess and structure.
- Sugar boost: Add 2 tbsp powdered sugar during stiff peaks to lock in shape.
Shaping Techniques for the Signature Dome
Here’s how to shape the dome:
- Spread a base layer of stabilized cream over the custard-filled cake.
- Build upward, rotating the cake while adding cream in rings to form a rounded top.
- Use an inverted bowl as a guide—press a spatula against it while shaping to achieve symmetry.
- Trim edges with a knife and smooth peaks for a polished finish. Aim for a 2–3-inch peak at the center.
Check if the cream is stable by gently touching it. It should spring back. This ensures your princess cake stays in shape when displayed. Mastering the dome takes time, but these steps will help you achieve that classic Swedish look.
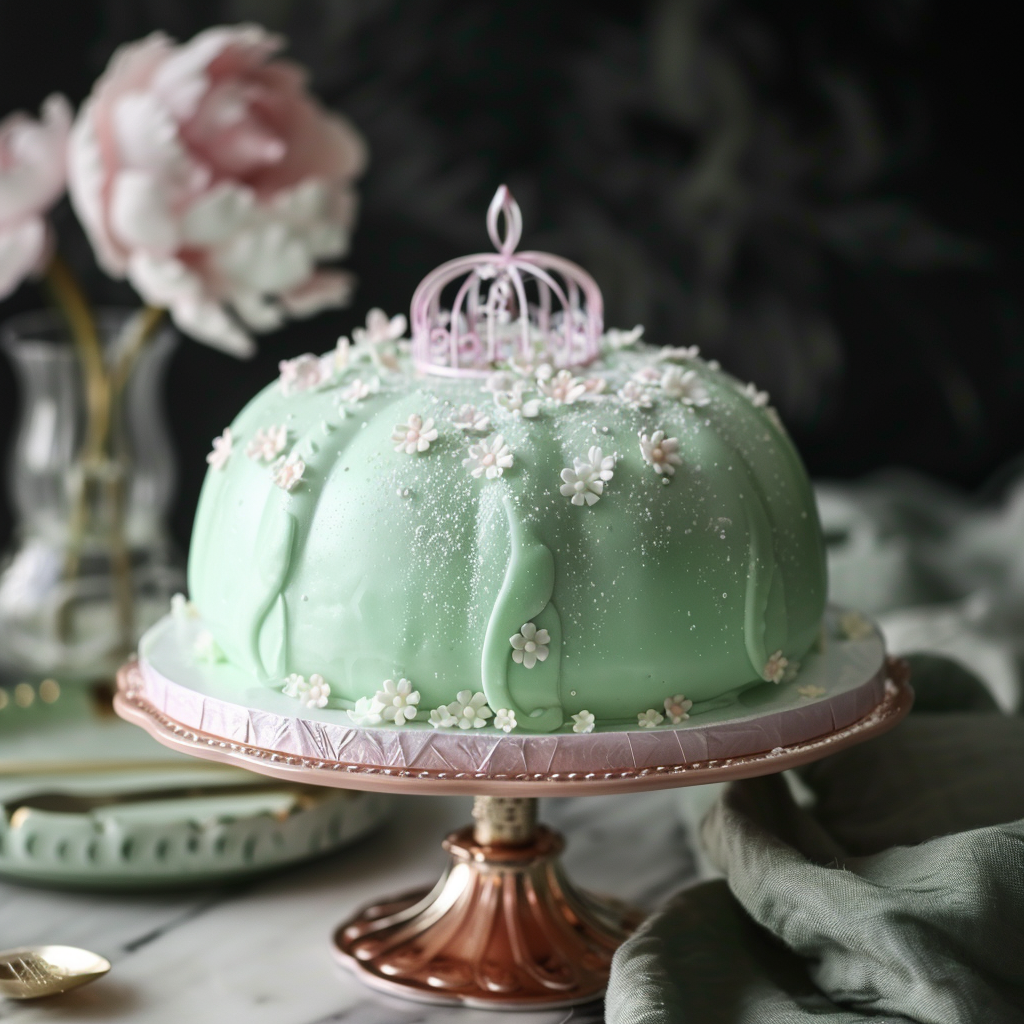
Mastering the Marzipan Covering
The final touch of a princess cake is its marzipan coat. This layer turns a layered dessert into the famous prinsesstarta loved worldwide. Start by picking store-bought marzipan like Callebaut’s Royal Icing Marzipan or make your own with a 2:1 almond paste to powdered sugar ratio.
Rolled to Perfection
Use a swedish princess cake template or a rolling pin with spacers for 1/8-inch thickness. Don’t overwork the dough to avoid tears:
- Dust the surface with cornstarch to prevent sticking.
- Roll in one direction only, rotating the marzipan 90° after each pass.
- Check consistency by pinching a small piece—it should hold shape without cracking.
| Brand | Recommended Thickness | Key Tip |
|---|---|---|
| Callebaut | 1/8” (3mm) | Roll at room temperature for flexibility |
| MCC | 1/8” (3mm) | Add 1 tsp shortening per 8 oz for smoother rolling |
Green as the Swedish Forest
Mix Americolor Super Gel in a 4:1 ratio of lime green to white gel for the traditional color. Warm the marzipan slightly for even color. Pro tip: Roll a small sample strip first to test shade and texture.
Wrap and Smooth
Cover the chilled cake base with a slightly larger marzipan sheet. Use a bench scraper to press edges smoothly:
- Work quickly—the marzipan firms in 5–7 minutes.
- Use a damp finger to press seams and smooth bubbles.
- Trim excess with a sharp knife after full adhesion.
“Practice on a small chocolate bar before tackling the full cake,” advises pastry chef Emma Svensson of Stockholm’s Fazer bakery.
Fix tears by moistening edges with water and pressing together. Store unused marzipan in an airtight container with a damp cloth to retain pliability.
Step-by-Step Assembly of Your Swedish Princess Cake
Learn the final steps of how to make a princess cake with this detailed guide. Each layer must fit perfectly to make the swedish princess cake look just right.
- Put a parchment-lined cake board (at least 9 inches) on a flat surface. Place the first sponge layer in the center. If needed, brush it with simple syrup.
- Spread ½ cup vanilla custard over the first layer. Put the second cake layer on top, then another ½ cup of custard. Finish with the last cake layer and the remaining custard. Use an offset spatula to smooth everything out.
- Fill a piping bag with whipped cream and a star tip. Pipe a spiral from the center outwards. This will create the cake’s dome shape. Use a bench scraper to smooth out the top.
- Put marzipan over the dome, stretching it tight. Cut off the extra edges and fold them under the base. Press the marzipan gently to seal the edges.
- Dust the cake with powdered sugar using a fine sieve. Place a marzipan rose on top and green leaves around the base with colored marzipan.
“The princess cake recipes that last focus on stability. Work fast—whipped cream gets soft at room temperature. Try to finish in 20 minutes,” says Swedish patissier Emma Johansson.
Trim the cake edges before stacking. Chill the cake for 10 minutes before adding marzipan. This helps the layers set. Always rotate the layers as you stack to avoid cracks. For the best look, assemble the cake just before serving to keep the cream firm.
Troubleshooting Common Princess Cake Problems
Baking a princess cake can sometimes go wrong, even if you’re careful. These fixes help you solve issues quickly. This way, your dessert will still look and taste perfect.
Fixing Cracks in Marzipan
Cracks in the green marzipan coating often happen if it dries too fast. To repair them:
- Use tiny scraps of extra marzipan as “patches”
- Moisten cracked areas gently with water
- Smooth with oiled fingers or a toothpick
Preventing Soggy Cake Layers
Sogginess usually comes from uncooled layers absorbing too much filling. Follow these steps:
- Chill custard and sponge layers completely before assembly
- Add a thin buttercream layer between cake and custard
- Serve within 24 hours to avoid moisture buildup
Solutions for Melting or Sliding Whipped Cream
Unstable whipped cream can ruin the cake’s shape. Try these fixes:
- Chill tools and mixing bowls before whipping
- Add 1-2 tsp cornstarch to stabilize cream
- Chill each layer 15 minutes before adding next
- Use wooden dowels in multi-layer cakes
Mistakes happen even to seasoned bakers! These tips keep your princess cake looking elegant. For more princess cake recipes or step-by-step guides, search for trusted sources. Remember, practice makes perfect—don’t let minor issues discourage you from mastering this iconic treat.
Conclusion: Enjoying Your Homemade Princess Cake
Once your swedish princess cake is ready, let it sit at room temperature for 30 minutes before slicing. Use a sharp knife dipped in hot water between cuts to ensure clean layers. Serve with coffee or tea, as traditionally enjoyed in Sweden, to balance the rich flavors of the prinsesstarta. For storage, keep it refrigerated but loosely covered to avoid drying out the marzipan. Enjoy it best within 2–3 days for peak texture and taste.
Sharing your creation is part of the tradition. Snap photos to showcase your version—maybe a festive green marzipan for celebrations or seasonal toppings. Experimenting with colors or fillings lets you personalize this classic dessert while honoring its roots. Every slice tells a story of patience and craftsmanship.
Mastering this iconic dessert takes practice, but the result is a showstopping prinsesstarta that blends Swedish heritage with your own creativity. Whether for a holiday gathering or a personal milestone, it’s a dish that invites pride and curiosity. Remember, even small adjustments in technique or ingredients can transform it into a memorable treat.
As you present your finished princess cake, you’re not just serving dessert—you’re sharing a piece of Sweden’s culinary legacy. The effort to perfect its layers, custard, and marzipan dome ensures a reward as sweet as the cake itself. Now it’s time to let others taste the pride of your baking journey.
FAQ
What is a Swedish Princess Cake?
A Swedish Princess Cake, also known as Prinsesstårta, is a layered delight. It has a light sponge cake, custard, whipped cream, and green marzipan. It’s topped with a marzipan rose and sometimes has seasonal touches.
When is Princess Cake traditionally served?
The Swedish Princess Cake is a birthday star in Sweden. It’s the highlight of special celebrations.
What are the main ingredients in a Princess Cake?
The cake’s heart is sponge cake, vanilla custard, whipped cream, and marzipan. Quality ingredients make it special.
Can I make a Princess Cake in advance?
Yes, you can prep parts ahead. Bake and freeze the sponge cake layers. Make the custard a day before. Assemble it fresh for the best taste.
How do I achieve the perfect dome of whipped cream?
For a perfect dome, whip the cream until firm but not too stiff. Use gelatin or sugar to stabilize it. A bowl helps shape the dome.
What should I do if my marzipan tears while draping it over the cake?
Fix torn marzipan with small pieces and a bit of water. Smooth it with your fingers for a flawless finish.
How do I prevent my cake layers from becoming soggy?
Keep layers cool before assembling. A thin buttercream layer helps prevent sogginess.
What are some common problems when making a Princess Cake?
Common issues are cracked marzipan, soggy layers, and unstable cream. Cool properly, use stabilizers, and fix cracks with marzipan.
What can I use if I can’t find marzipan?
Make a marzipan substitute with almond paste, powdered sugar, and corn syrup. Or, use fondant as a last resort, though it changes the taste.